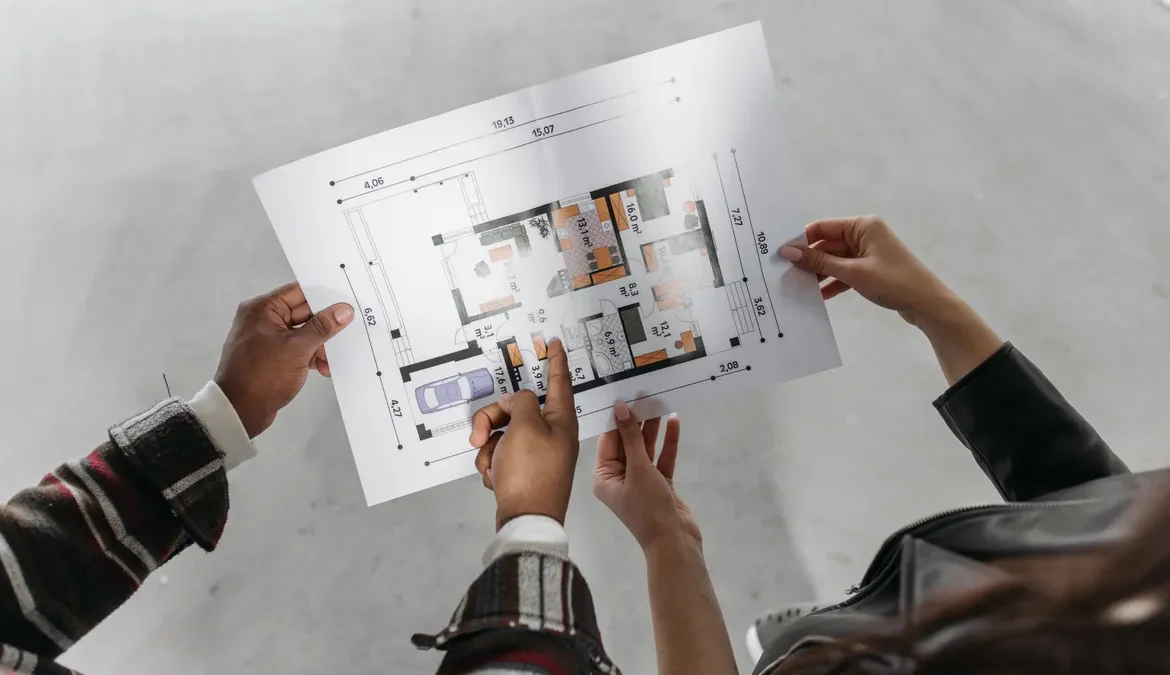
ADU design review checklist before you finalize plans
Last updated: October 21, 2026
Key Takeaways
- An ADU design review should catch anything that makes the plans inconsistent, hard to build, or awkward to live in.
- The full check is a coordinated review of the drawings, not a single pass.
- You review an ADU floor plan by walking the space in order, then checking whether each move has enough room to happen.
- Door swings and appliance clearances can go wrong when the plan treats open space as if it were empty space.
An ADU design review checklist before you finalize plans is the last chance to catch layout mistakes, coordination gaps, and permit-killing details before you pay for final sheets or start pricing the build. If the floor plan, site plan, elevations, window schedule, and appliance clearances do not agree now, the fix is still a redline; after permit or ordering, it becomes delay and change orders.
What an ADU design review should catch

An ADU design review should catch anything that makes the plans inconsistent, hard to build, or awkward to live in. The goal is not to debate taste. It is to confirm that the floor plan, site plan, elevations, and window schedule all tell the same story.
Therefore, start with the boring items first, because the boring items cause the expensive problems. A door that swings into a bed alcove, a fridge that cannot open fully, or a bathroom wall that shifts 6 inches on one sheet but not another can stall a plan set quickly. The same is true for window locations that may look fine in elevation but can fail the furniture layout inside the room.
This review is also where you decide whether a room is actually usable. A studio with a nice rendering can still fail the basic test of storage, circulation, and appliance fit. If the bed, table, and sofa only work when drawn at unrealistic sizes, the plan is not finished.
The cleanest way to think about it is simple: if a contractor, reviewer, or future buyer compared two sheets side by side, would they describe the same ADU? If the answer is no, the design is not ready.
For broader layout standards, this checklist belongs next to the hub on . The hub should handle design direction; this page is for the review pass before finalization.
What should be checked before approving ADU plans?
The full check is a set of coordination tests, not a single pass over the drawings. A good review usually takes 30 to 60 minutes per sheet set, then another pass after markups are made. According to the U.S. Department of Housing and Urban Development, an accessory dwelling unit is a self-contained housing unit, so the review has to verify that the unit behaves that way on every sheet. HUD Accessory Dwelling Units
- Match the floor plan to the site plan. Confirm the unit footprint, setbacks, entry location, patio steps, utility chases, and any exterior doors line up across sheets. The result should be one plan, not three versions of the same idea.
- Trace every door swing. Open each interior and exterior door on paper and see what it hits. A 30-inch door that lands against a vanity, closet door, or bed edge is a design error, not a minor detail.
- Check appliance clearances. Verify refrigerator, range, dishwasher, washer, and dryer dimensions against the cabinet plan and note the clear space needed to open doors, lids, and pull-out trays. A 24-inch dishwasher or a 30-inch range still needs room beyond the box itself.
- Review window locations from both sides. On the exterior, windows should align with elevation rhythm and privacy. On the interior, they should not fight cabinet runs, headboards, or sofa placement. A window that looks elegant on elevation can sometimes limit one of the better walls for furniture.
- Confirm storage in real numbers. Count closets, pantry depth, linen space, and utility storage. A 24-inch-deep closet is common for hanging storage, but shallow niches and decorative cubbies do not replace usable storage.
- Lay in furniture at scale. Put a queen bed, sofa, dining table, or desk on the plan at realistic dimensions. If circulation depends on shrinking every piece, the plan is pretending.
- Compare the window schedule to the elevations and floor plan. Size, type, and location should match on all three. A missing transom or swapped awning window sounds small until ordering day.
- Read dimensions outward from the walls. Interior clearances, hallway widths, and bath turns should be checked from finished faces, not just from loose overall room sizes. This keeps the plan buildable after finishes are added.
The biggest mistake at this stage is checking only whether the rooms fit on paper. They may fit on paper. What matters is whether the plan works once doors move, appliances open, and furniture lands in the room.
How do you review an ADU floor plan?

You review an ADU floor plan by walking the space in order, then checking whether each move has enough room to happen. That means entry, storage, kitchen, bath, sleeping area, and circulation.
Before anything else, begin at the main entry and trace the path in one continuous line. Can someone enter, shut the door, set down groceries, and move into the unit without side-stepping around a cabinet? A tiny entry landing may look harmless, but it often makes the whole home feel cramped.
Next, inspect the kitchen as a working triangle without forcing a rigid rule. The sink, range, and refrigerator should be placed so the user does not cross traffic through the cook zone every time a door opens. The exact triangle matters less than the collision points. If a dishwasher door blocks the walkway or a range hood bumps a window head, the layout needs work.
Then review the bath. The toilet should not be the first thing visible from the living room if another arrangement is possible, and the shower entry should not interfere with the vanity door or towel storage. A 60-inch turning circle is a common reference point for accessible design, but even without an accessibility target, the room should let a person move without scraping elbows.
The bedroom or sleeping area needs special scrutiny. If the bed is drawn at 60 by 80 inches for a queen, there should still be enough side clearance to change sheets and reach a nightstand. A bed pushed tight to three walls can work in a pinch, but it is not a complete design unless the client knowingly accepts that trade-off.
Finally, finish the walk by checking utility and storage walls. Mechanical equipment, water heater access, laundry hookups, and cleanout points should not be hidden behind built-ins that need demolition to service later. A neat plan that blocks maintenance is not finished; it is just tidy on the page.
This is the section where many generic reviews go wrong. They talk about style, roof shape, or materials first. Those matter, but a floor plan that fails circulation will still feel wrong even under good finishes.
Where do door swings and appliance clearances go wrong?
Door swings and appliance clearances go wrong when the plan treats open space as if it were empty space. They are not the same thing. A room can have 8 feet of width and still be unusable if a refrigerator door, shower door, and closet door all claim the same 3-foot zone.
The most common conflict is a door that opens into the wrong landing area. Interior doors should open to a wall whenever possible, not into the only place a person can stand. In compact ADUs, pocket doors can help, but they are not free of compromise. They reduce swing conflicts, yet they add framing complexity and need careful wall space for hardware and structure.
Appliance clearances need equal attention. A dishwasher at the end of a run may look fine until the open door blocks the aisle. A refrigerator at the edge of a wall may fit on paper but fail because the door cannot open wide enough for bins and drawers to slide out. The plan should show side clearances, depth with handles if relevant, and the path needed to load or service the appliance.
Watch the cooktop and oven too. A range should not land too close to a wall return or tall cabinet. Without enough side clearance, splatter control, safe pot handling, and drawer access all suffer. A 30-inch range is common in small kitchens, but the box width alone is not the question. The question is whether the adjacent cabinet faces and countertop ends leave it workable.
The safest way to catch these issues is to draw the door arc and the appliance envelope on top of the plan, then have a qualified designer or contractor confirm the clearances. If the two shapes overlap in a way that creates a pinch point, fix it before anyone prices cabinets. That single markup often saves more time than a dozen cosmetic comments.
Who this is not for: if the ADU is still being argued as a vague concept, this level of review is premature. You need a rough layout decision first. This checklist is for plans that are close and need a hard pass before finalization.
What window locations and elevations should be compared?
Window locations and elevations should be compared sheet to sheet so the exterior expression and interior layout stay aligned. A window schedule without that cross-check is only half the story.
Start with head heights, sill heights, and alignment. Windows that line up cleanly in the elevation often look intentional, but the interior can tell a different story. A window centered on the exterior wall may land exactly where a bed headboard or kitchen upper cabinet needs to go. That is why this check has to include both the elevation and the room layout.
Privacy matters here as much as symmetry. In an ADU near a property line, driveway, or shared yard, a large low window can create awkward sightlines into the bedroom or bath. The design may still be legal and still be a bad fit. A smaller or higher placement can solve the issue without changing the room size.
The window schedule should name the type and size clearly enough that the elevation matches the plan with no guesswork. If one sheet says a casement and another implies a fixed pane, the design is not coordinated. The same is true for grouped windows. A pair of 2-foot windows and one 4-foot window are not interchangeable just because they fit the wall.
In small units, window placement also affects furniture. A 6-foot sofa under a low window is a problem if the sill height leaves no back clearance. A desk under a window can work well, but only if the glazing height allows a monitor, lamp, and task light to fit without glare or head bumping.
A good rule in final review: every window should earn its place in daylight, privacy, or furniture planning. If it does none of those, it is probably decorative baggage.
What storage and furniture fit should be confirmed?
Storage and furniture fit should be confirmed at actual scale, because a small unit fails fastest when the furniture arrives. This is the section that separates a pretty plan from a livable one.
Measure the main pieces directly on the drawing. A queen bed is not just a label; it claims the room with a mattress, frame, and access zones on at least one or two sides. A dining table needs chairs pulled back. A sofa needs walking room behind or beside it. If the plan only works with a loveseat where a sofa was intended, the design has quietly changed the program.
Storage needs the same honesty. Check for a real coat closet, linen space, pantry shelves, broom storage, and a place for luggage or off-season items. Decorative nooks do not count unless they can hold the intended item. A 12-inch-deep shelf might work for folded towels or books, but it is not the same as a proper closet or pantry run.
Use a furniture template or scaled cutout instead of eyeballing. That can be as simple as paper blocks on a printed plan or a CAD overlay. The point is to see what disappears when the furniture lands. In many ADUs, the hidden loss is circulation. A room that fits a bed and a dresser may still feel tight if there is no clear path to the bath or kitchen.
This is also where you catch false multipurpose claims. A desk nook that becomes unusable once the chair is pulled out is not really a desk. A storage bench that blocks a window or heater register is not free storage. If one object can only exist by pretending another object is not there, the layout needs another pass.
For a final check, ask one simple question: can the unit absorb normal living, not just staged photos? If the answer depends on careful habits and no possessions, the plan is underbuilt.
The mistakes that cost the most in final plan review
The most expensive mistakes are the ones that force rework after drawings are coordinated or priced. A few lines on paper can save a lot of demolition later.
One common miss is inconsistent dimensions between sheets. A wall shifts 4 inches on the floor plan, but the elevation and window schedule are not updated. That can lead to wrong framing assumptions, misordered windows, or a bathroom that no longer fits. The fix is a line-by-line cross-check of room sizes, openings, and fixture locations before releasing the set.
Another frequent problem is overstuffing small rooms with too many fixed elements. Built-ins look efficient, but they can block flexibility. A plan that leaves no place for a different bed size, a child’s crib, or an accessible maneuvering path locks the future out of the room. Leave at least one wall or zone that can adapt.
A third mistake is ignoring service access. Water heaters, electrical panels, cleanouts, and laundry hookups need clear reach. If access requires moving furniture or removing millwork, the plan is not done. This often shows up in tight utility closets where the layout looks elegant until maintenance is needed.
A fourth issue is treating exterior openings as decoration rather than function. A window that lands behind a kitchen sink or a door that fights the only good furniture wall can make the whole unit feel compromised. The cure is not more styling. It is moving the opening.
The last mistake is stopping after the prettiest sheet. A polished rendering can hide basic coordination problems. Finalizing plans means comparing the whole set: floor plan, site plan, elevations, and window schedule. If one sheet is beautiful and the others disagree, the plan is still not ready.
Final sign-off: the short list to use before you finalize
Final sign-off should happen only after the plan passes a short, practical list: room sizes, door swings, appliance clearances, window locations, storage, furniture fit, and sheet coordination. If any one of those is unresolved, the set is not ready to freeze.
Use this last pass to mark three categories. First, items that are clean and coordinated. Second, items that need a small revision, such as a shifted door or window. Third, items that change the room’s function, like a missing closet or a kitchen aisle that is too tight. The third category should stop finalization until it is fixed.
This is also the moment to decide what you are willing to live with. Some compromises are real and acceptable in a compact ADU. A smaller dining table, a combined laundry nook, or a tighter circulation path may be fine if the program supports it. But compromises should be chosen, not discovered later.
If the checklist still leaves a major question, pause and compare the drawings one more time before you sign off.
Drafted with AI; not yet reviewed by a person.